It’s was the weekend so I wanted to get a bit more elaborate with my Inktober drawing for day 6 and the process ended up being a bit different, so I thought I’d put together a process post.

I started in pencil on the back of the dura lar. Though I knew I’d be painting a solid black around the figure, I drew the leaves around her anyways. Kind of a rehearsal really. Having done it in pencil once, would give me the confidence to go straight to ink with the leaves later.
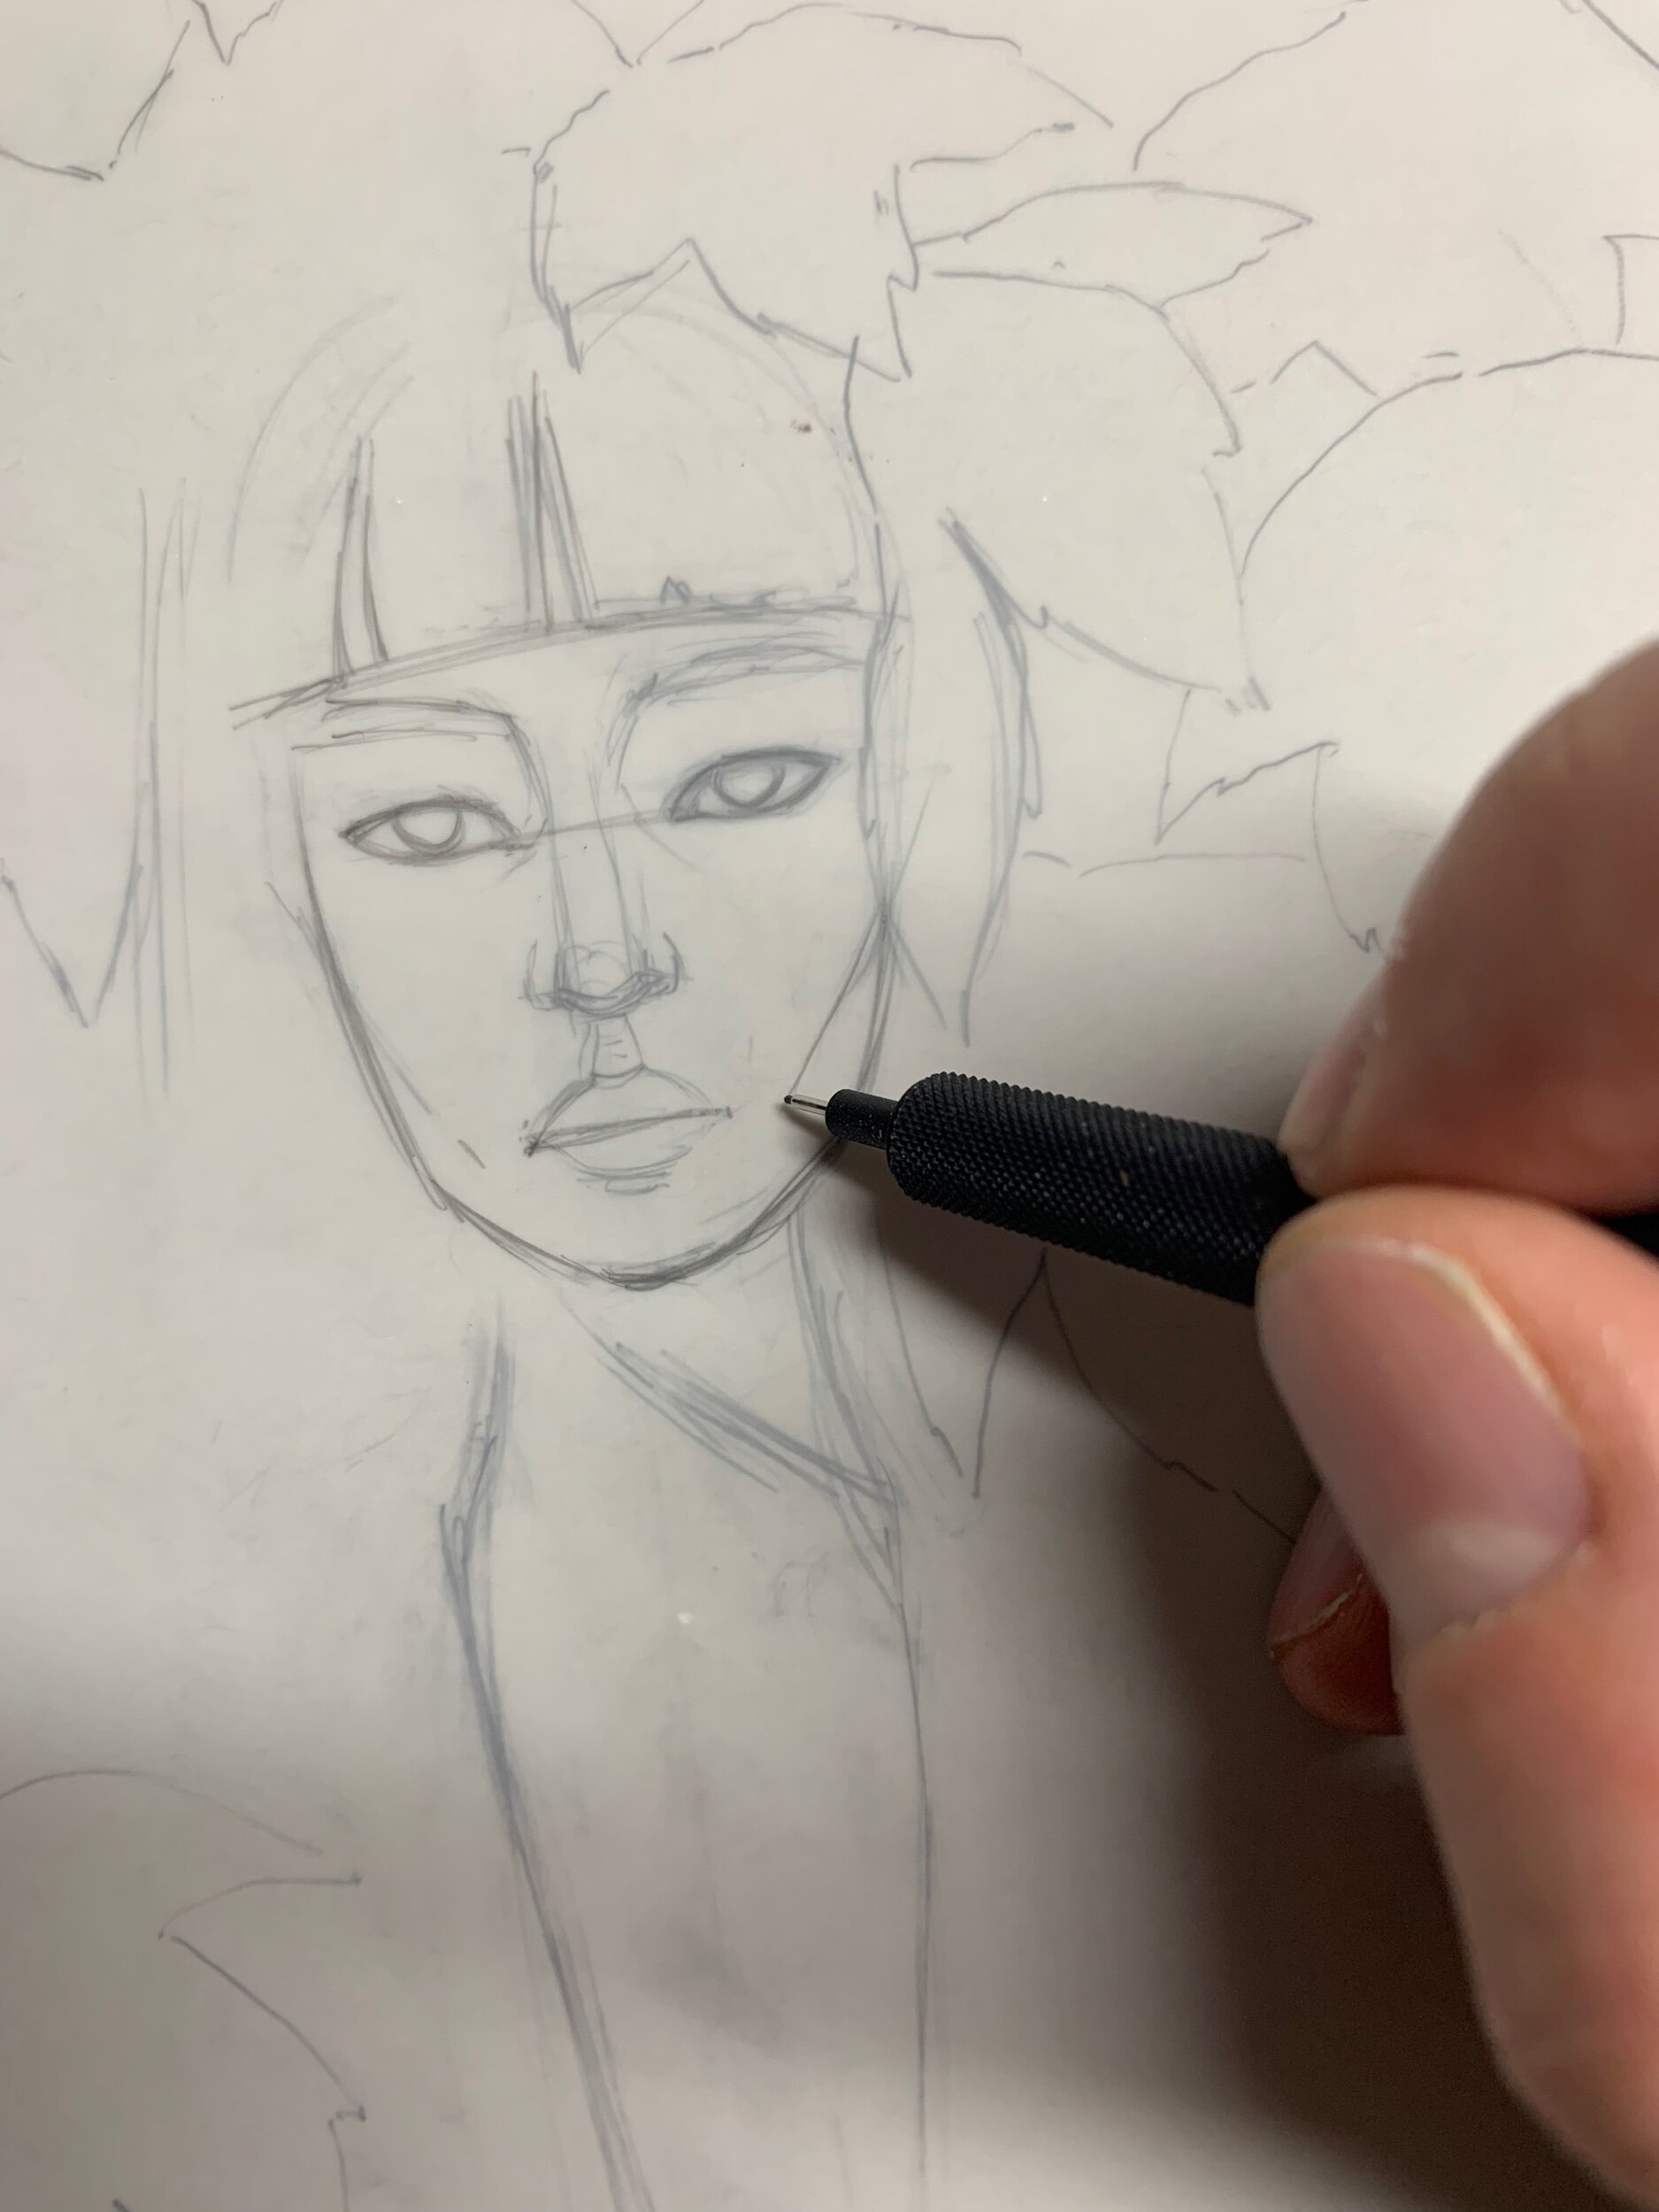
I then did the old trick of flipped the drawing to check for issues. This is one of the great things about working on the dural-lar. The drawing underneath is very easy to see, even without using my light tablet. Her face was feeling a little lopsided so I did some redrawing to corrected issues.

From here I started in on the inking. First doing the line work with a pigma micron 03 and 005.
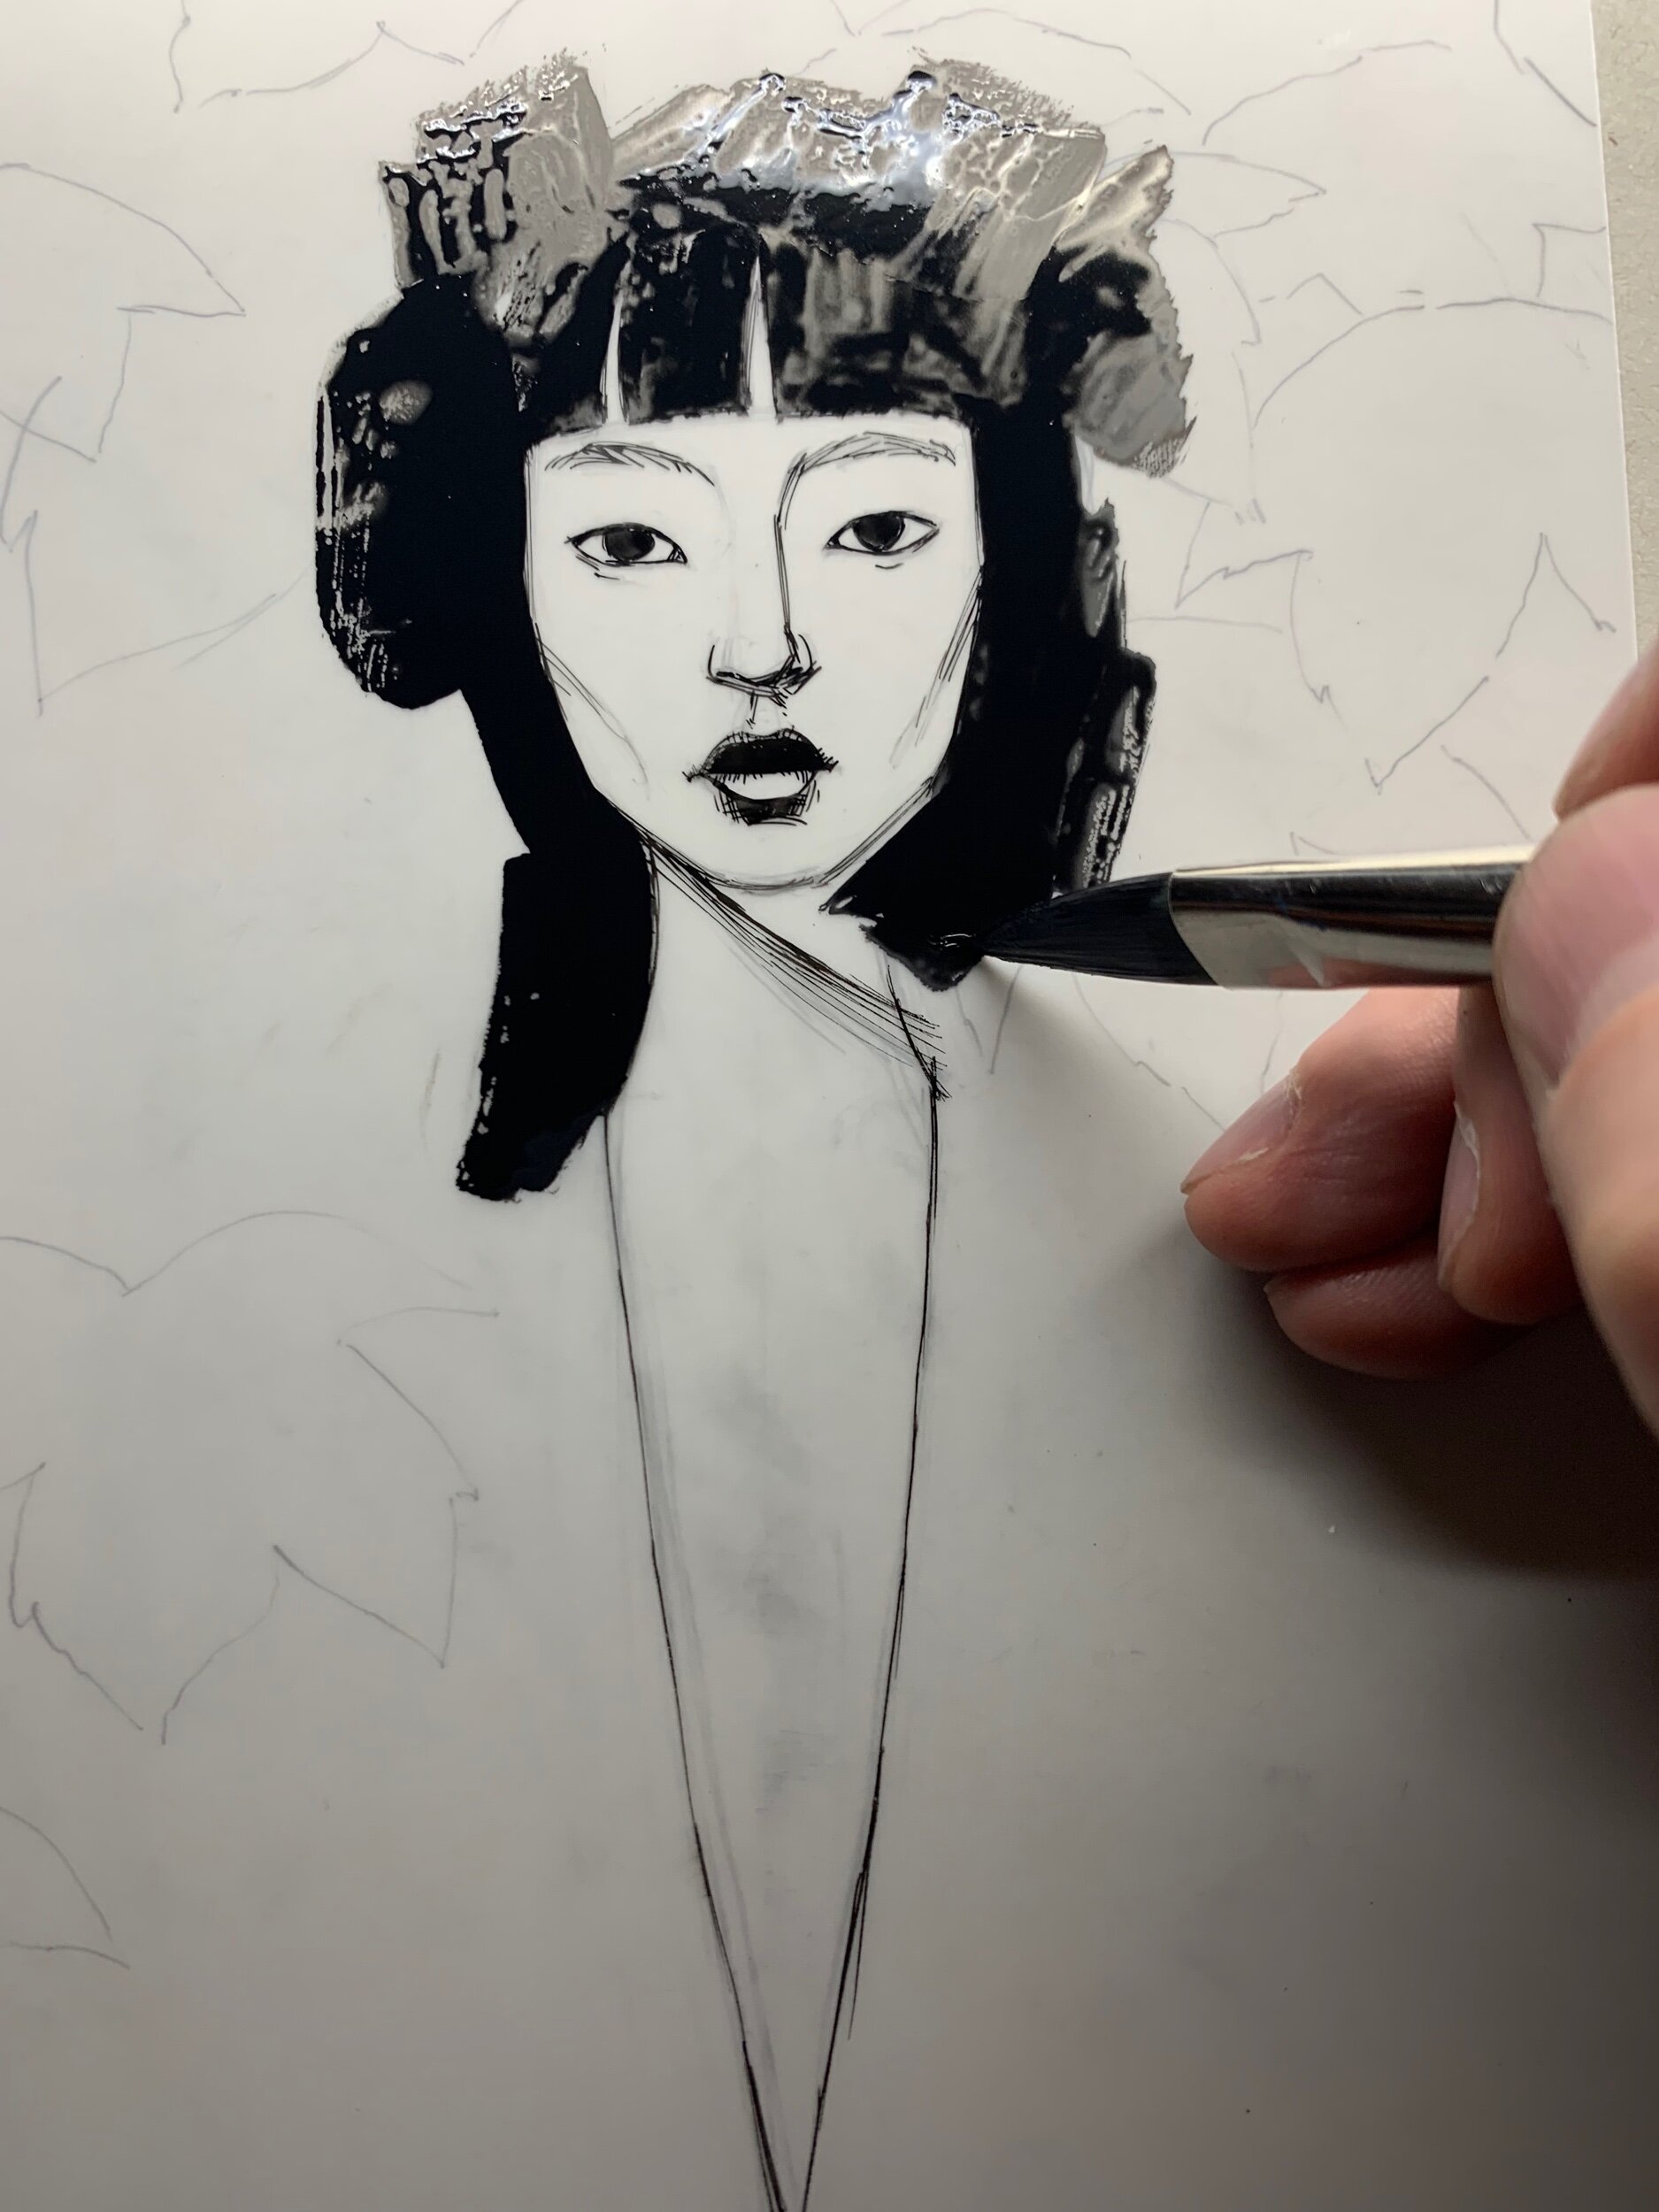
After getting the line work in place I filled in the negative space with black FW ink and a #8 pointed filbert brush.
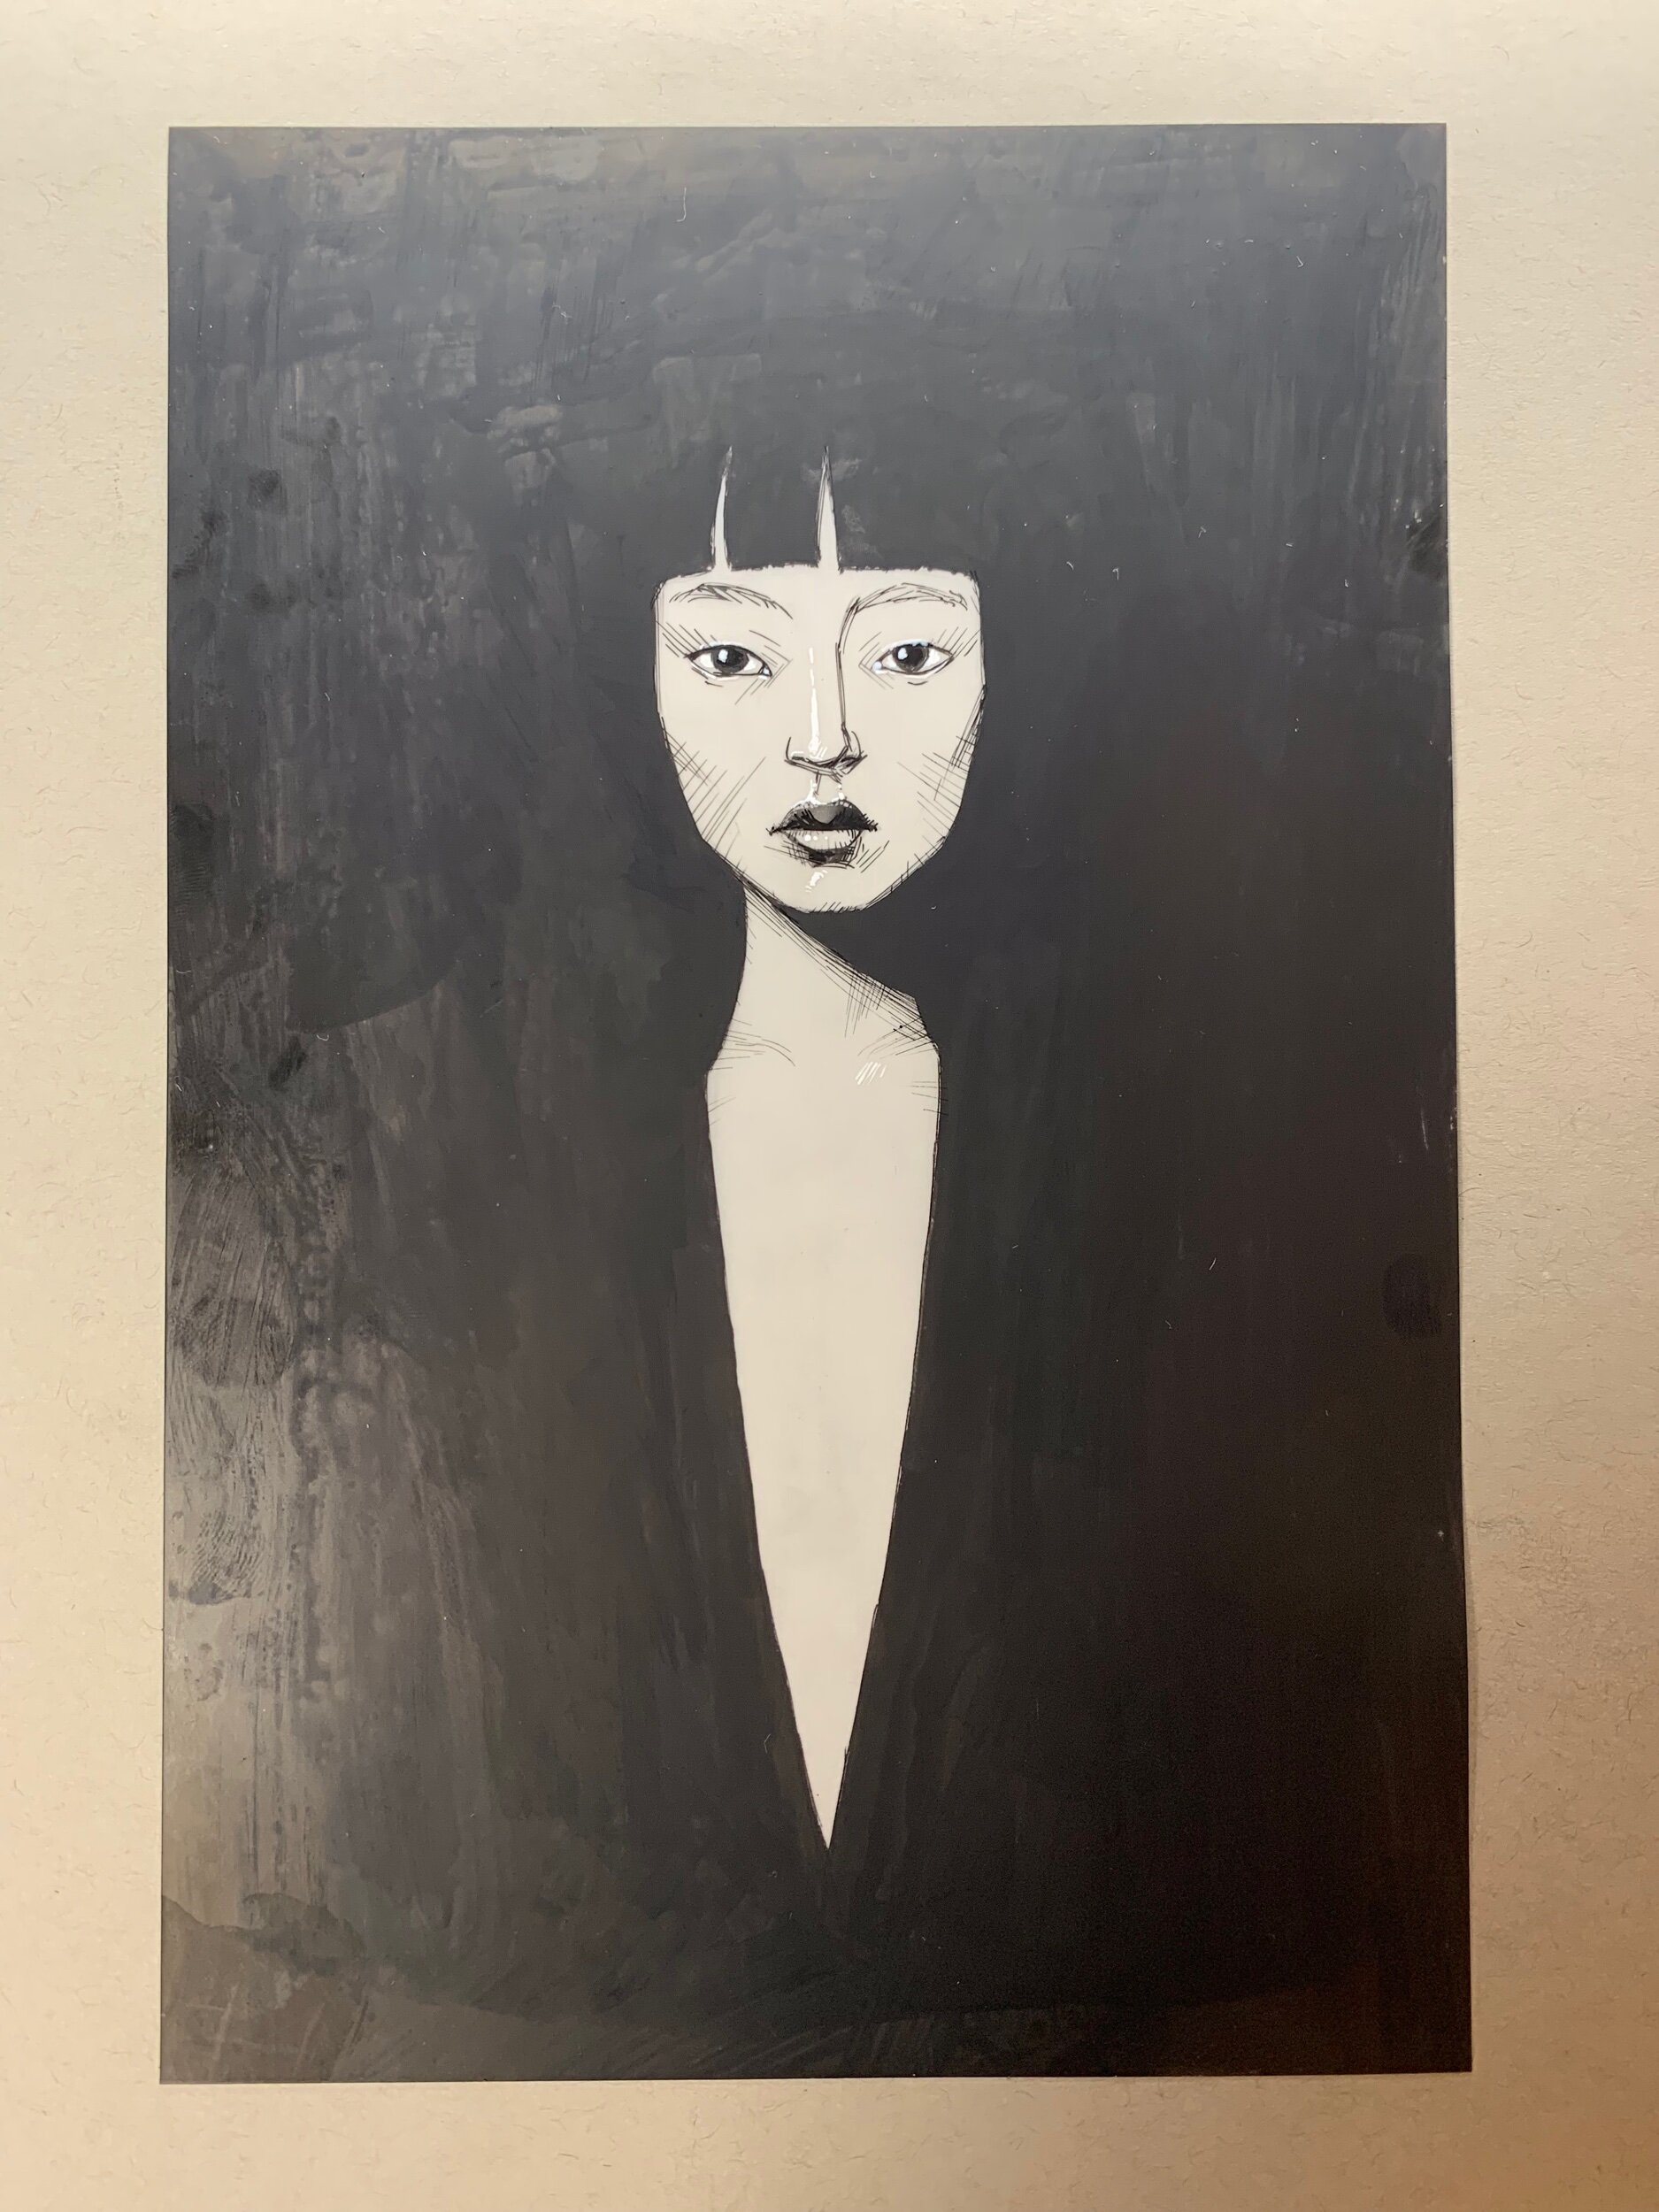
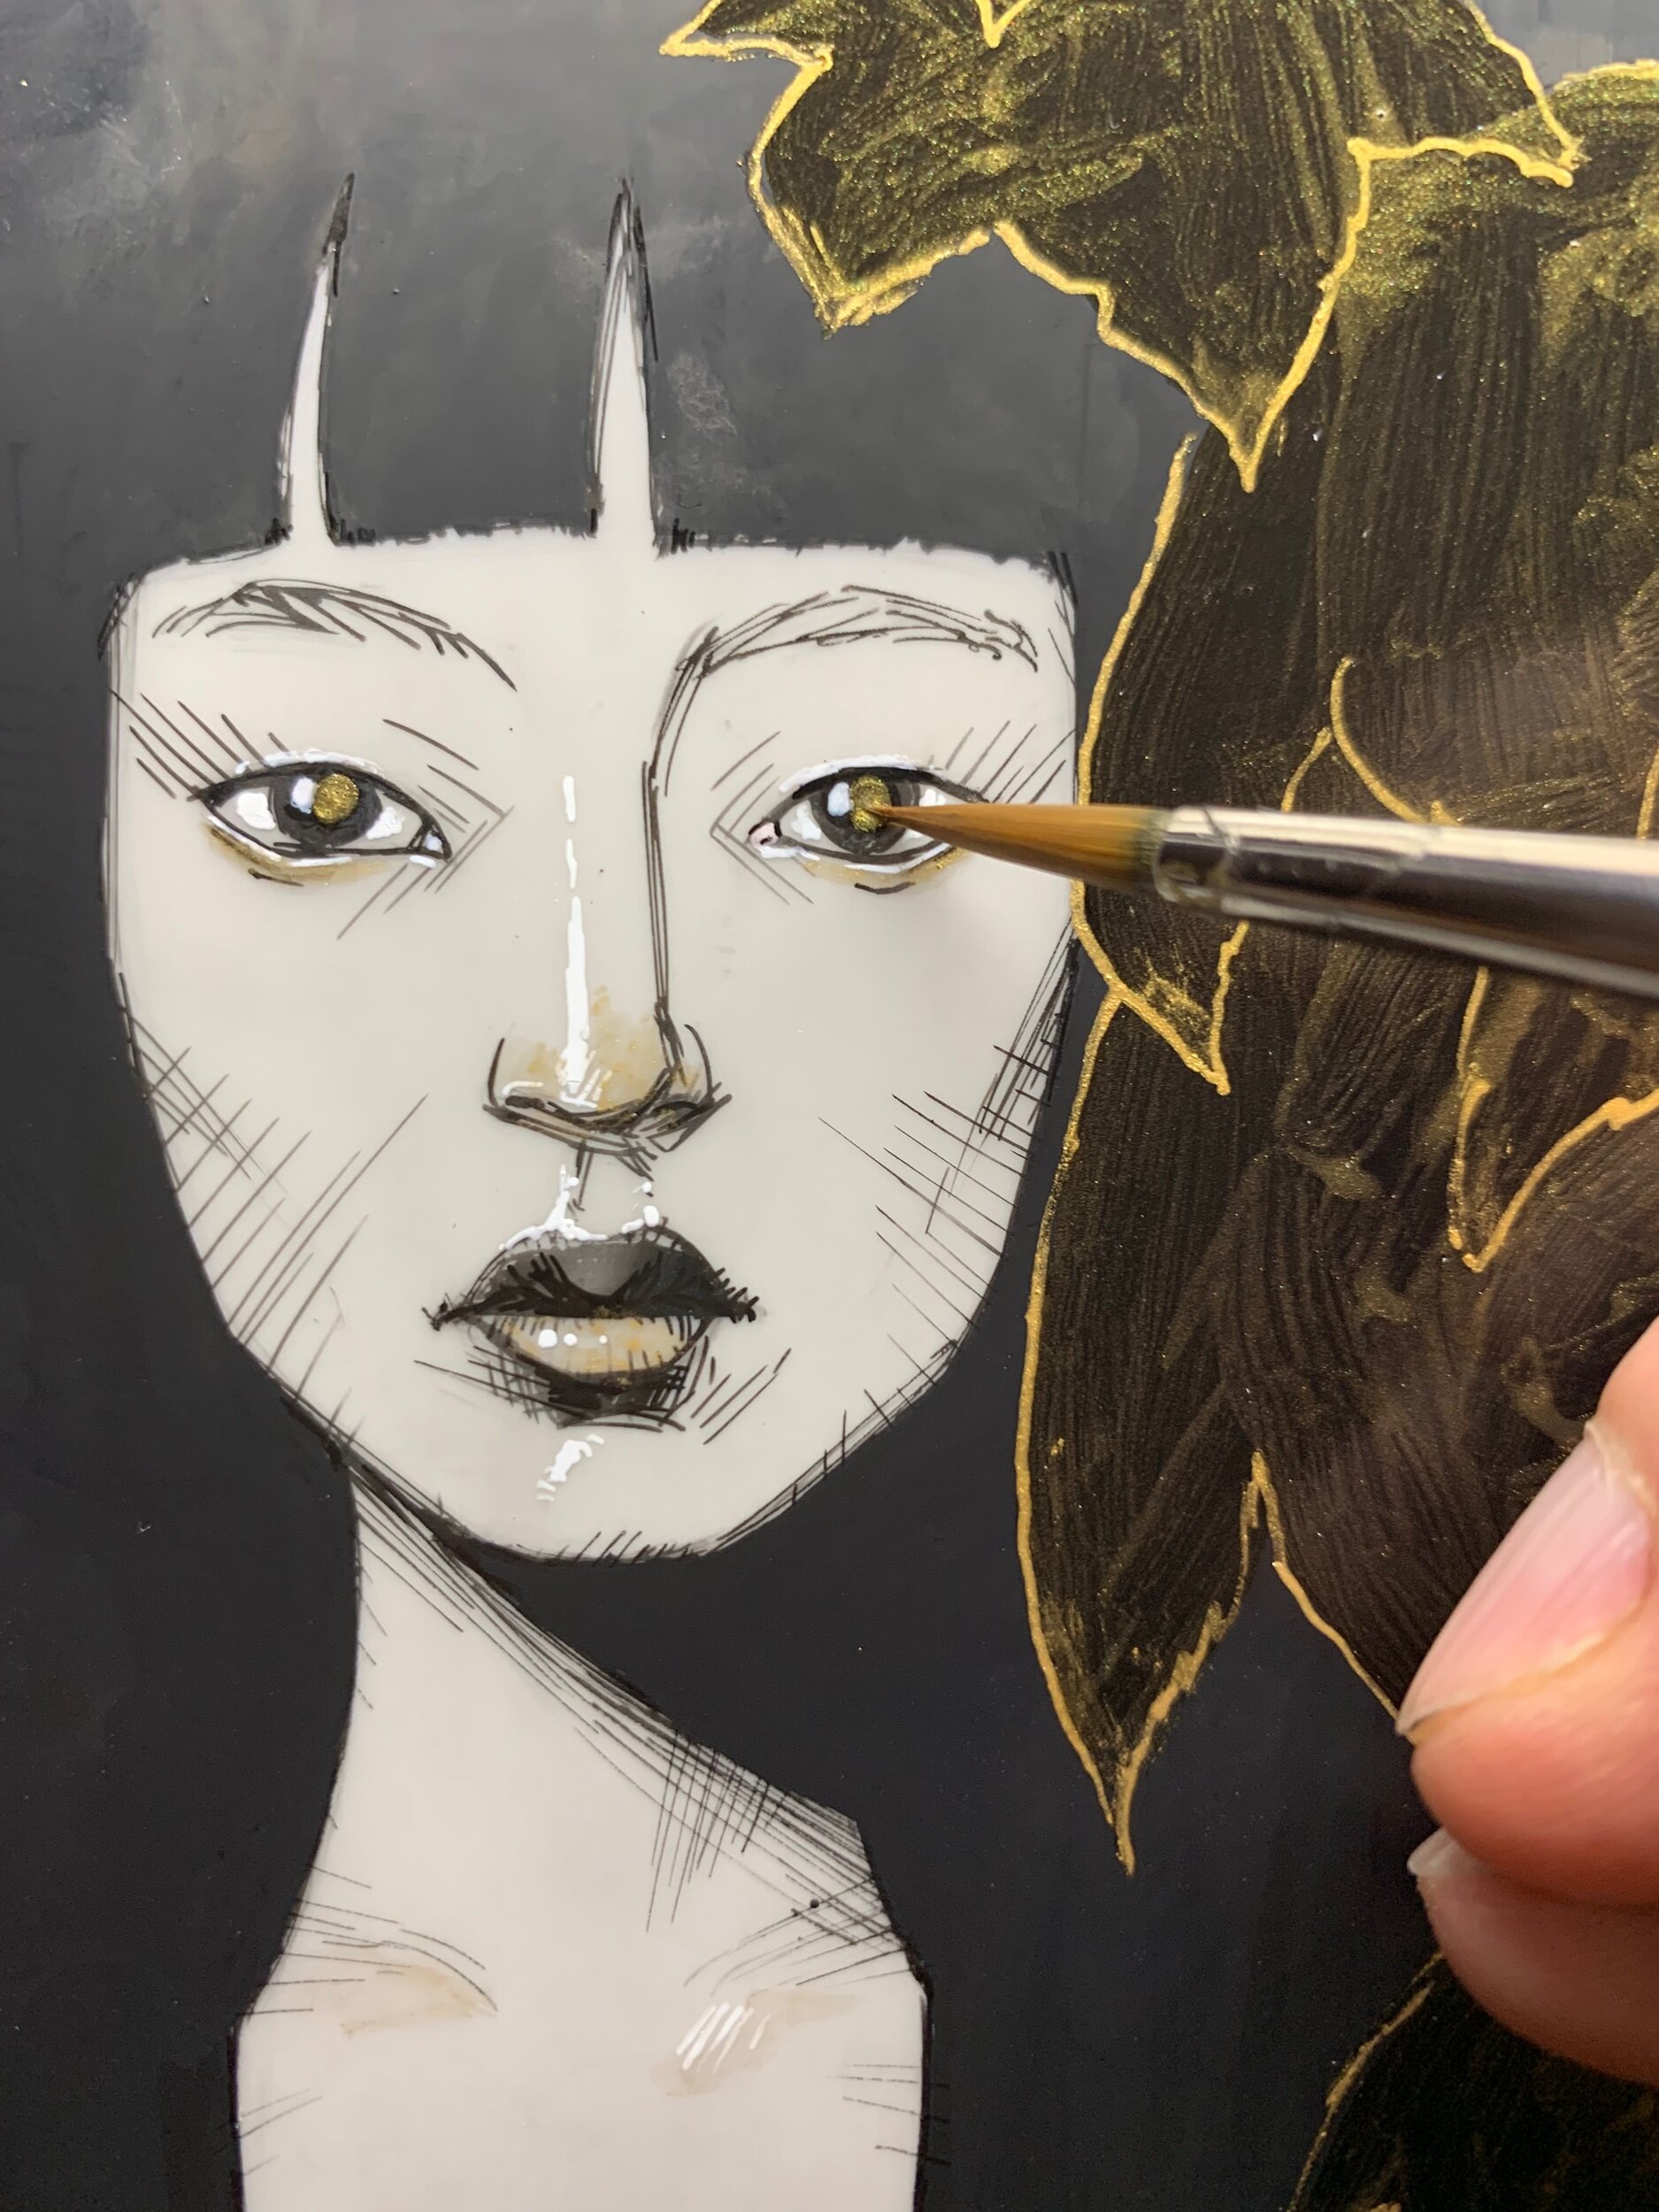
With the black negative space in place and the addition of some highlights with white FW ink, I was ready to move on with the leaves using a dip pen and gold FW ink.

With the gold line work of the leaves in place, I found I wasn’t really happy yet. I dry brushed in some gold fw ink areas on her noses and lips, as well on some of the leaves, but it still wasn’t doing it. It was feeling flat and needed more variety.
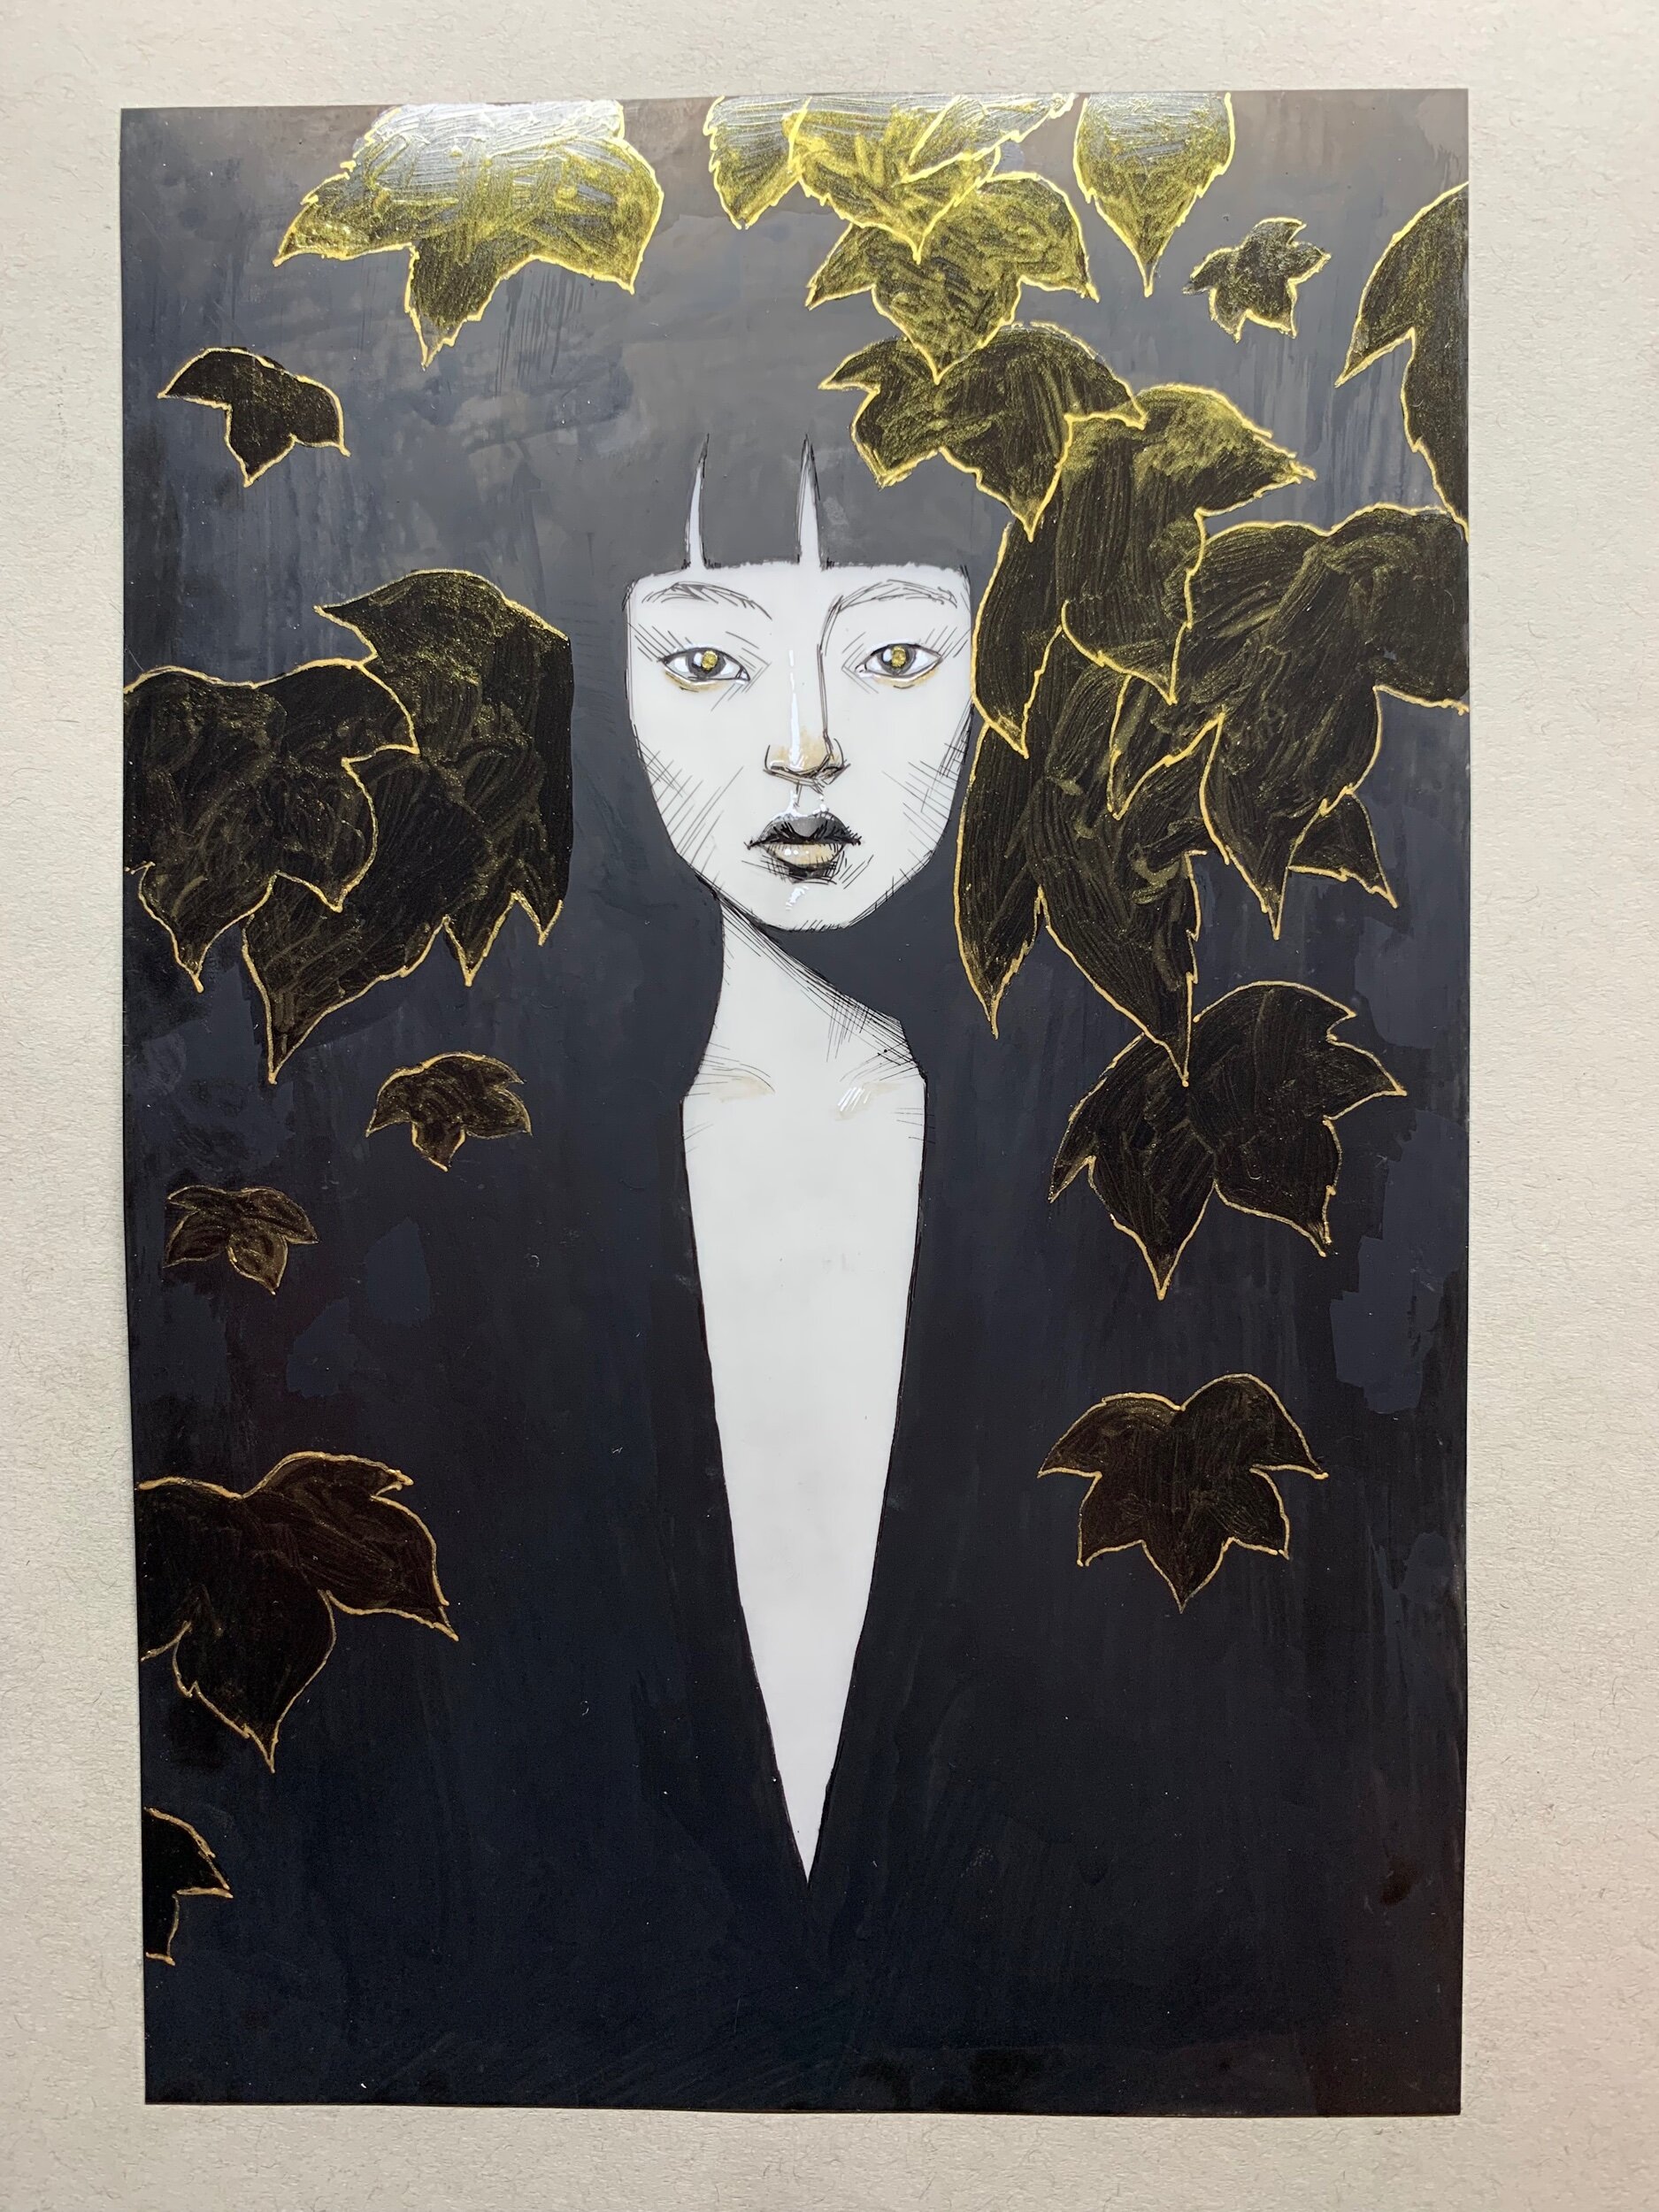
This lead me to the idea of using some glazing, so I mixed a small bit of the gold FW ink with some liquitex acrylic glazing medium, and applied it to the leaves and her pupils. That got the piece where I wanted it, giving it a nice mix of matt and gloss surface texture. Ready for my Inktober day 6 IG post.